We Built a Webinar Registration Page and Dashboard With Bluehost AI Builder
We built a live workshop registration page with Bluehost AI Builder from one paragraph: the page, the form, the signup dashboard and what to fix before launch.
Some links in this post are partner links. Hacking Demand may earn a commission if you sign up, at no extra cost to you. It never changes what we recommend.
Paid partnership with Bluehost. We earn a commission if you sign up through our links.
TL;DR: We gave Bluehost AI Builder one paragraph describing our November 18 live workshop, and about three minutes later it had built a full registration page and a dashboard to manage the signups behind it. It is $0 to start, no credit card. The page was close to ready. Before it could go live, we had to swap out a stock host photo and bio, check two details it filled in on its own, and clear the sample registrations it seeded the dashboard with. Here is the build, screen by screen, as of November 2026.
Why build an event registration page with AI?
We run free live workshops at Hacking Demand. Every one needs the same page: the date and time in the right time zone, what people will learn, who it is for, who is hosting, a short FAQ and a form that captures enough to follow up. Building that page by hand takes an afternoon. Building it in a webinar tool usually means living with the tool's template.
In our first Bluehost AI Builder walkthrough we built a B2B services landing page from one sentence. This time we wanted to test something with more moving parts: a page that collects registrations and somewhere to see them.
What did we ask for?
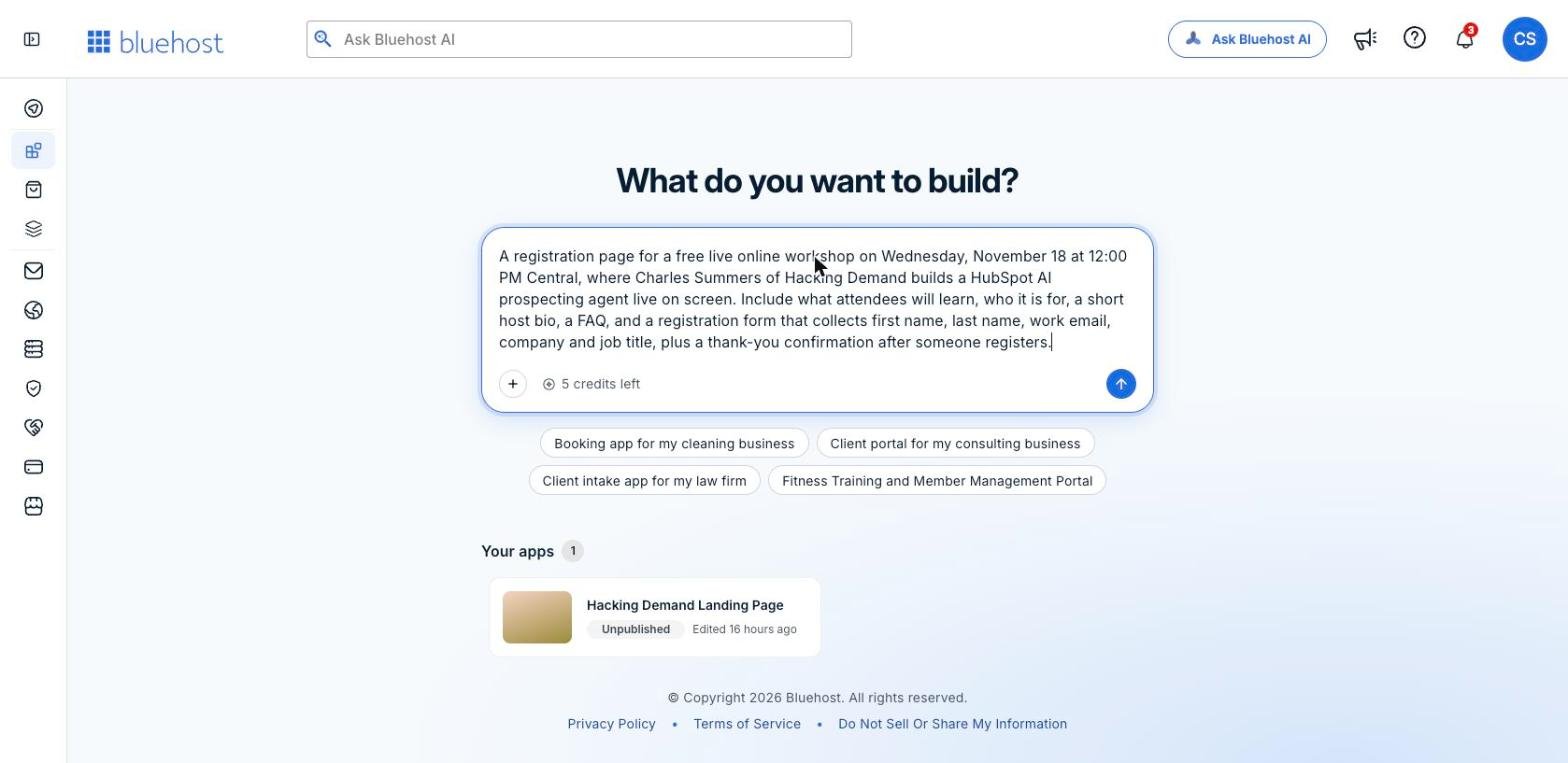
From the Bluehost AI Builder home screen in our account, we typed this into the "What do you want to build?" box:
A registration page for a free live online workshop on Wednesday, November 18 at 12:00 PM Central, where Charles Summers of Hacking Demand builds a HubSpot AI prospecting agent live on screen. Include what attendees will learn, who it is for, a short host bio, a FAQ, and a registration form that collects first name, last name, work email, company and job title, plus a thank-you confirmation after someone registers.
The prompt, typed on the AI Builder home screen. Our first build from the earlier walkthrough sits under Your apps.
An event page has more facts in it than a services page, so we put every one into the prompt: the date, the time with its time zone, that it is online and free, the exact form fields and the confirmation step. Anything you leave out, the builder will either skip or fill in with its own guess.
Step 1: Watch it build the page and the back end
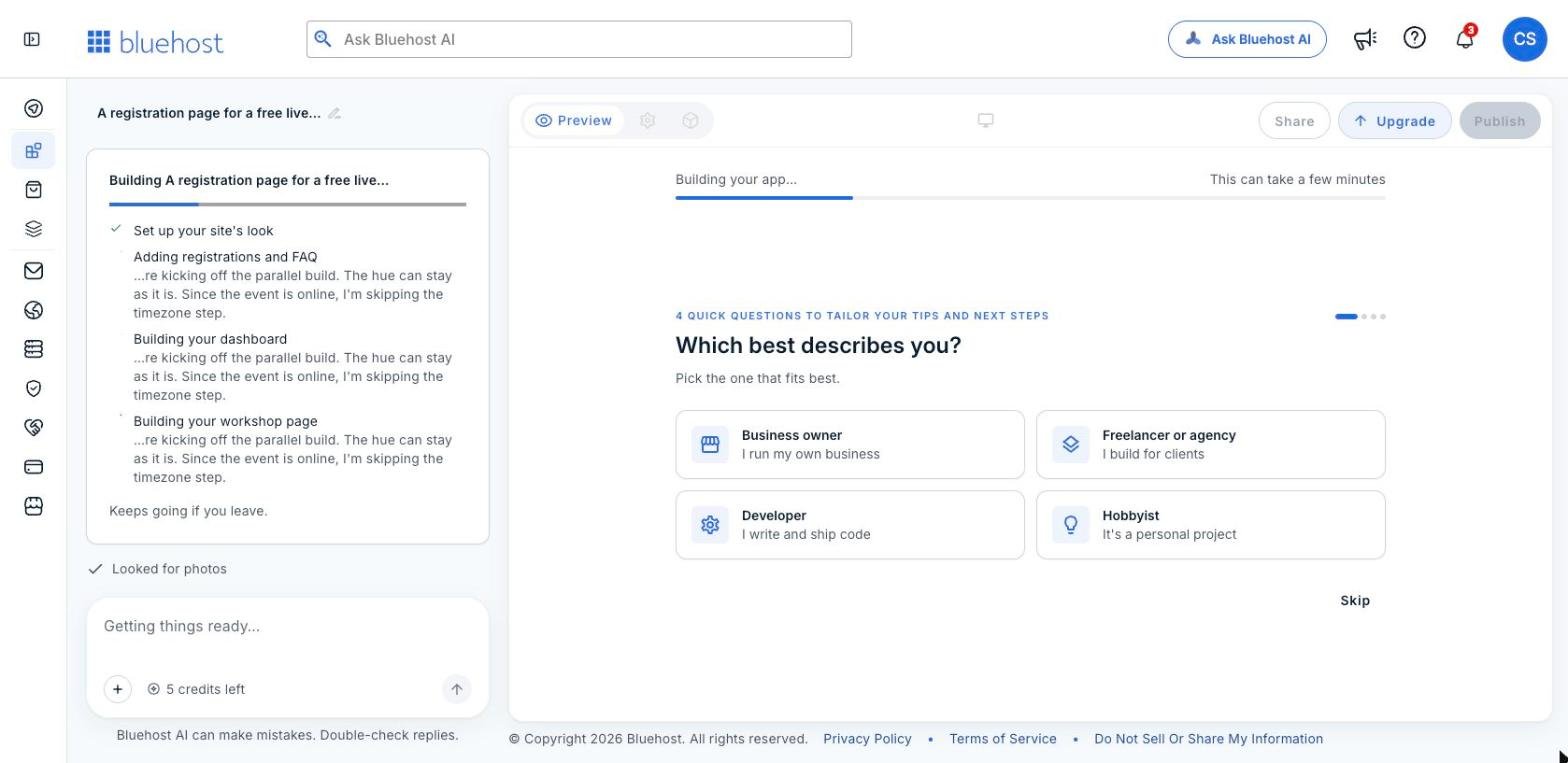
The build in progress. It worked on the registrations, the dashboard and the page at the same time.
The chat showed the plan as it ran: set up the site's look, then add registrations and the FAQ, build the dashboard and build the workshop page, all at once. It noted that it was skipping a time zone setup step because the event is online. The preview offered four optional questions to tailor its tips. We skipped them. A note under the progress list said the build keeps going if you leave the page.
The whole build took about three minutes.
Step 2: Read the page it made
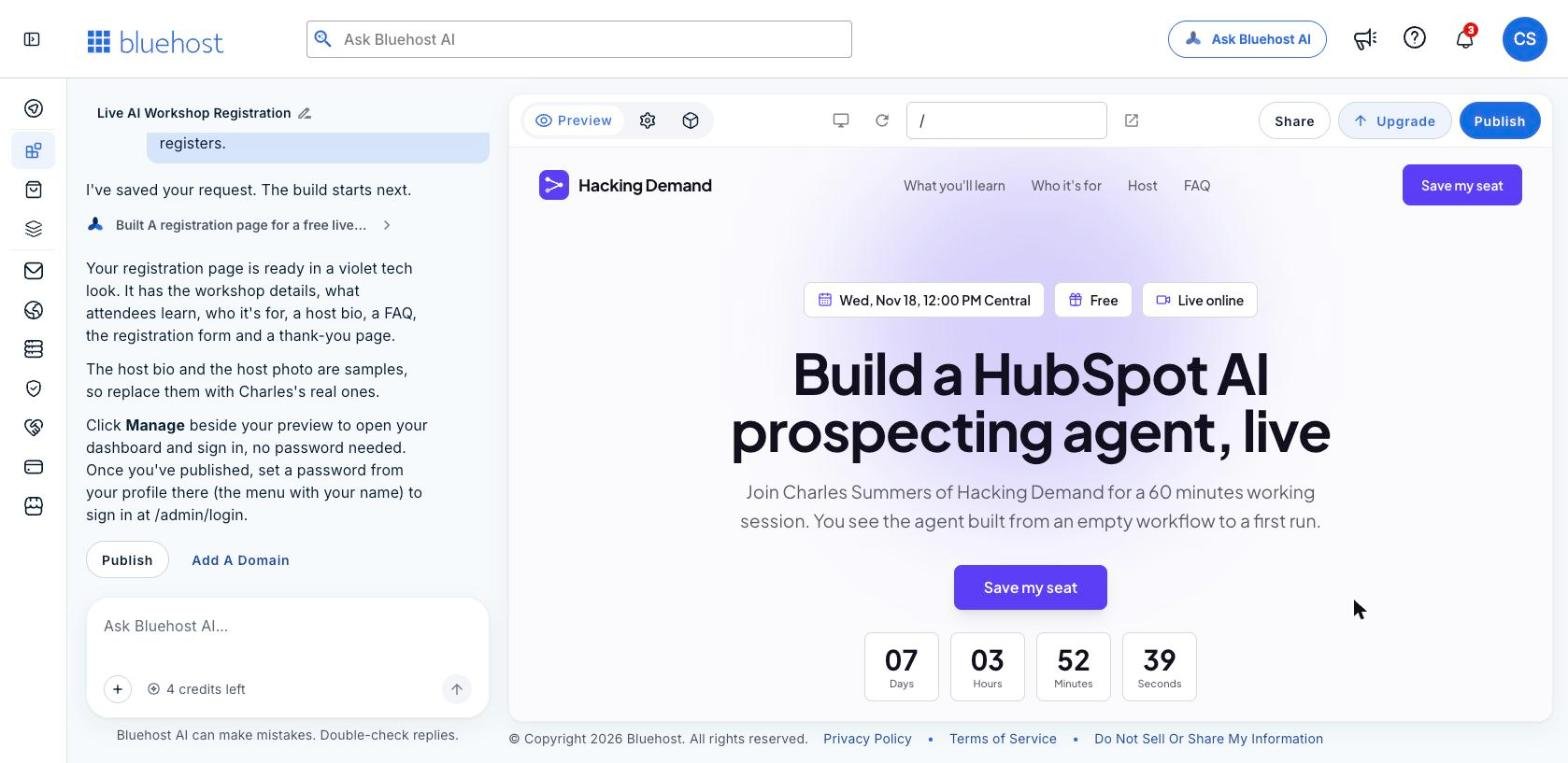
The top of the page: date, price and format chips, the headline, a Save my seat button and a working countdown.
The first draft came back in a violet tech look with the headline "Build a HubSpot AI prospecting agent, live." Under it were three chips for the date and time, Free and Live online, a Save my seat button, and a countdown timer that was already counting down to the right minute. The header carried links to each section and its own Save my seat button.
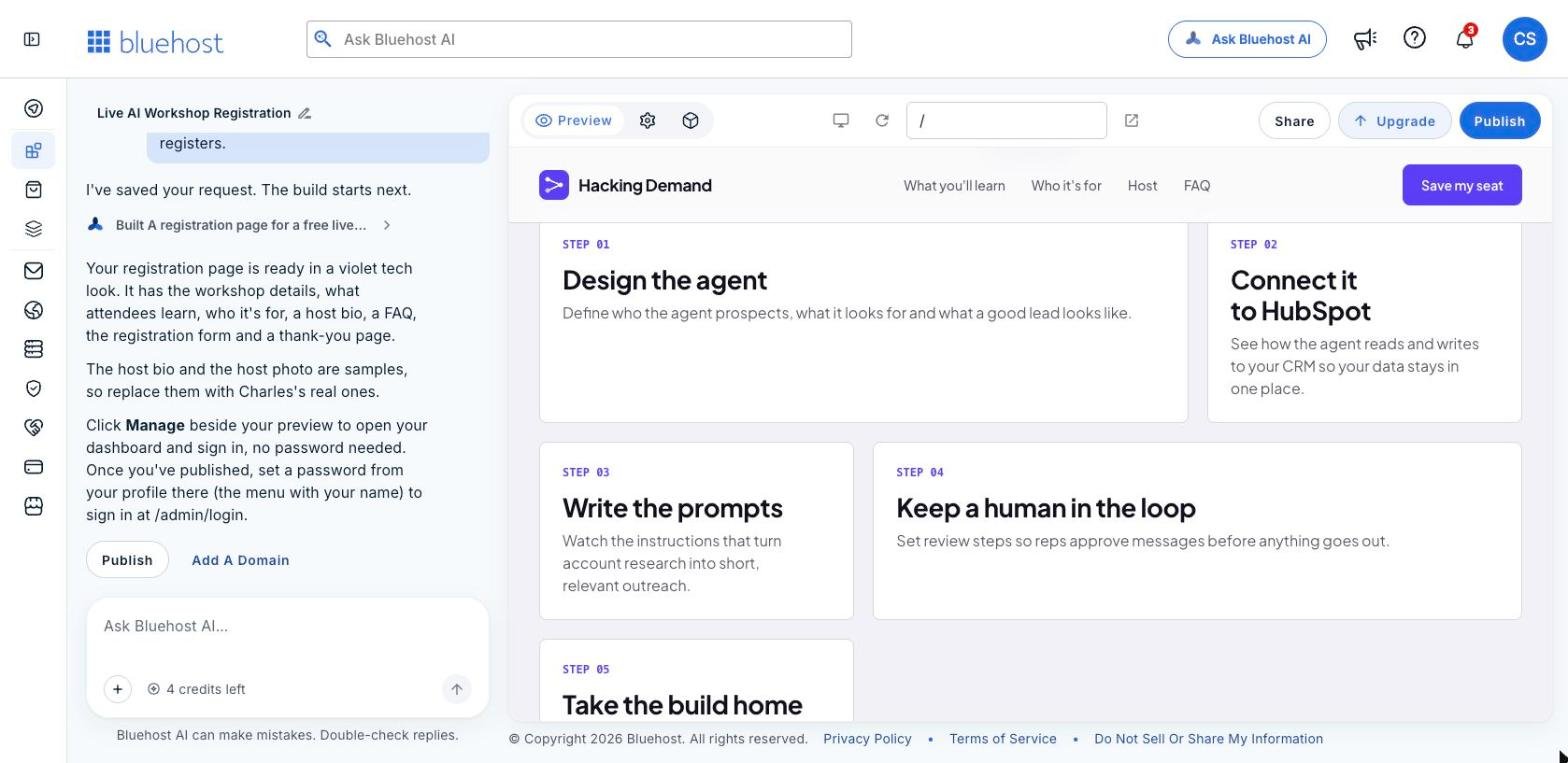
"What you will learn," written as five steps.
"What you will learn" became five steps: design the agent, connect it to HubSpot, write the prompts, keep a human in the loop, and take the build home. "Who it is for" named sales leaders, RevOps teams and marketing operators, each with a one-line reason. For a page we had not written a word of, the structure was right and the copy was close to how we would pitch the session ourselves.
Step 3: Check every fact it filled in on its own
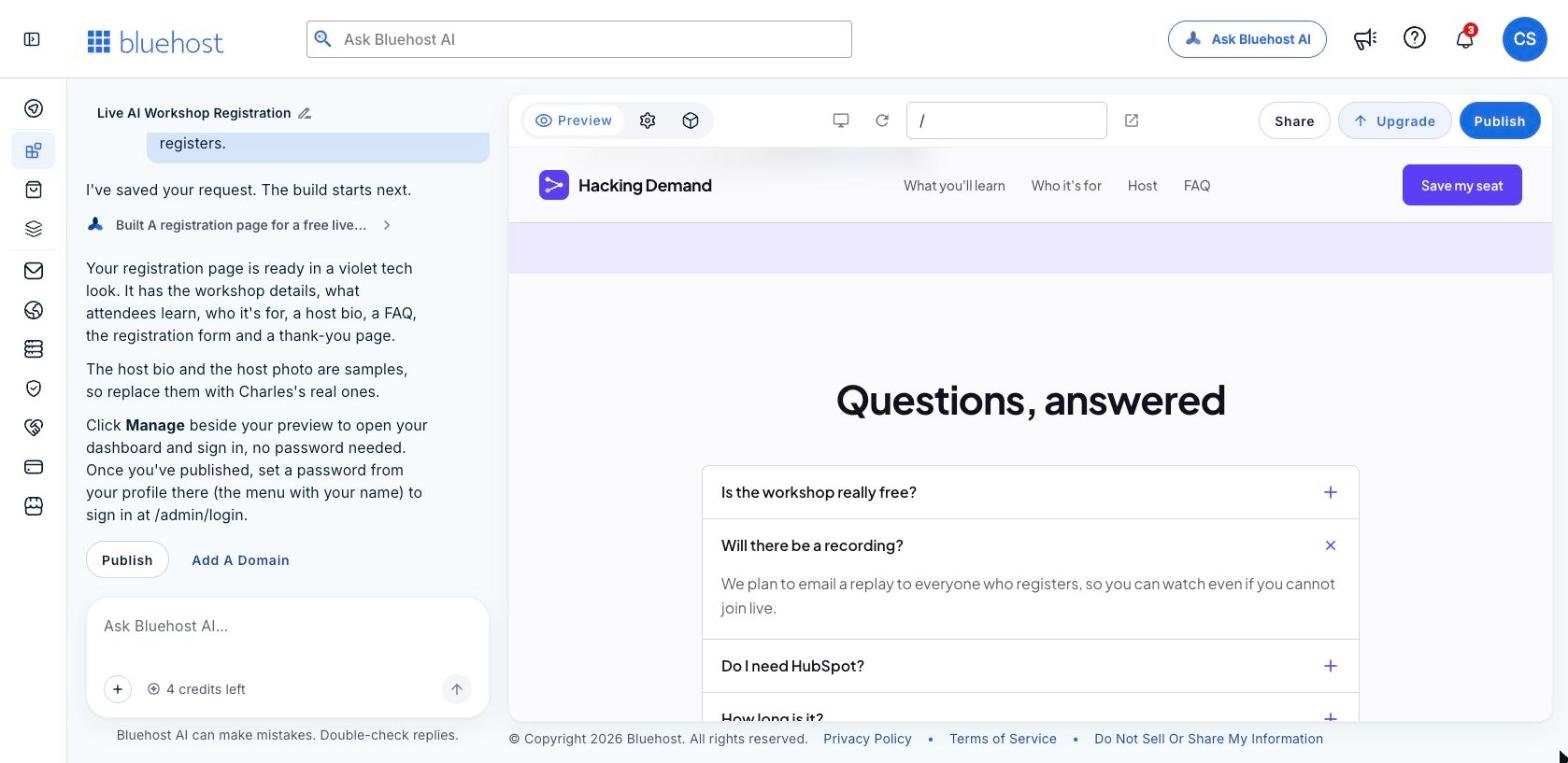
The FAQ promises a replay. Our prompt never mentioned one.
The FAQ had six questions: is it really free, will there be a recording, do I need HubSpot, how long is it, how do I join, and can I ask questions. The answers were clear. Two of them were also things we never told it. It said the session runs 60 minutes, and it promised to email a replay to everyone who registers.
Both happen to be true for this workshop. That is luck, not a feature. If your session has no recording, or runs 90 minutes, the page would be promising something you will not deliver, and registrants remember promises. Read every FAQ answer and every detail line against the real event before you publish.
Step 4: Replace the sample host, by chatting
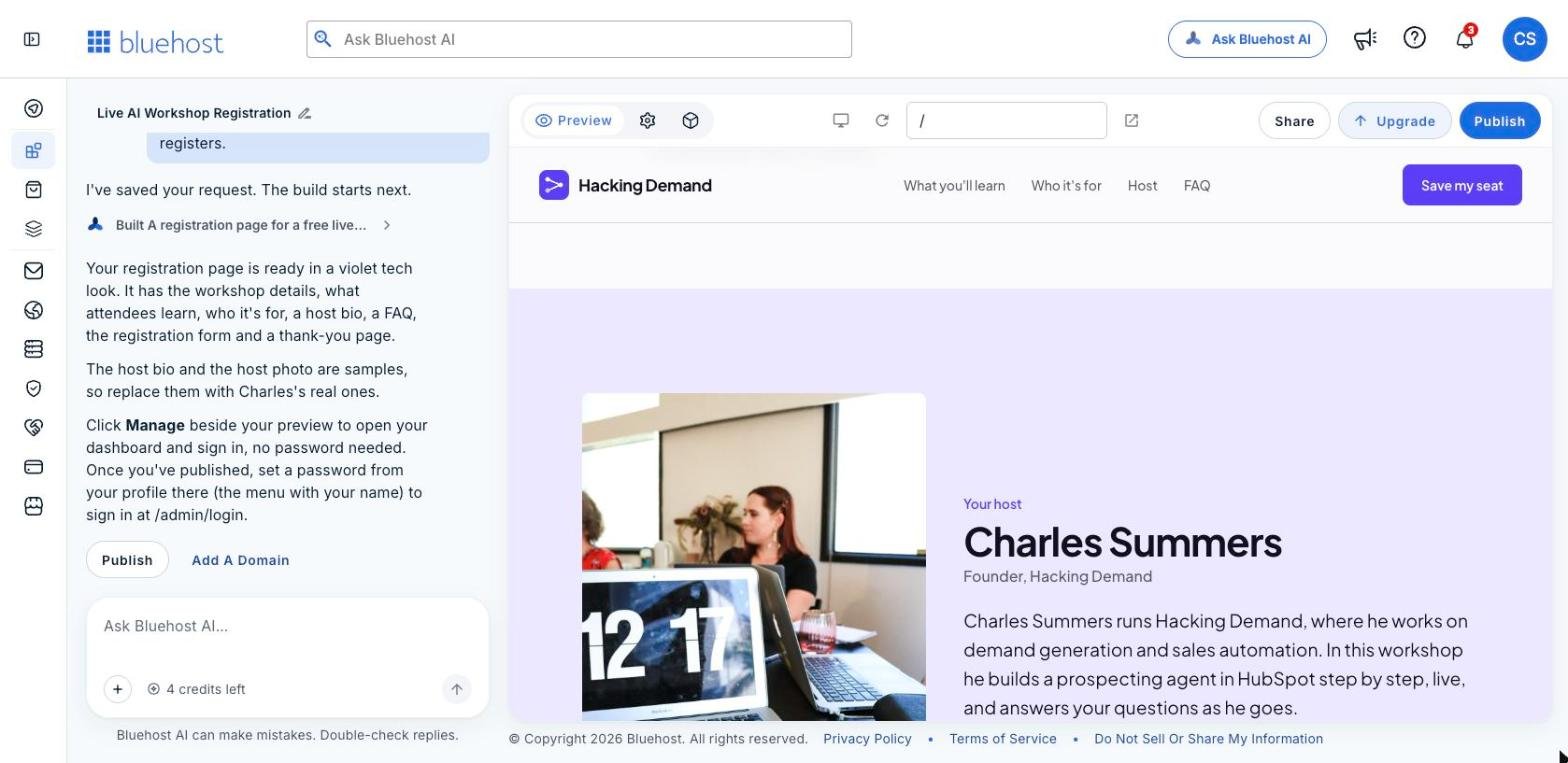
Before: a stock photo of someone else under our host's name, with a generic bio.
The host section used a stock office photo and a generic bio. The builder said so in the chat: the host bio and photo were samples to replace. A stock photo of a stranger above your host's name is the fastest way to make a real event look fake, so this was the one change we made.
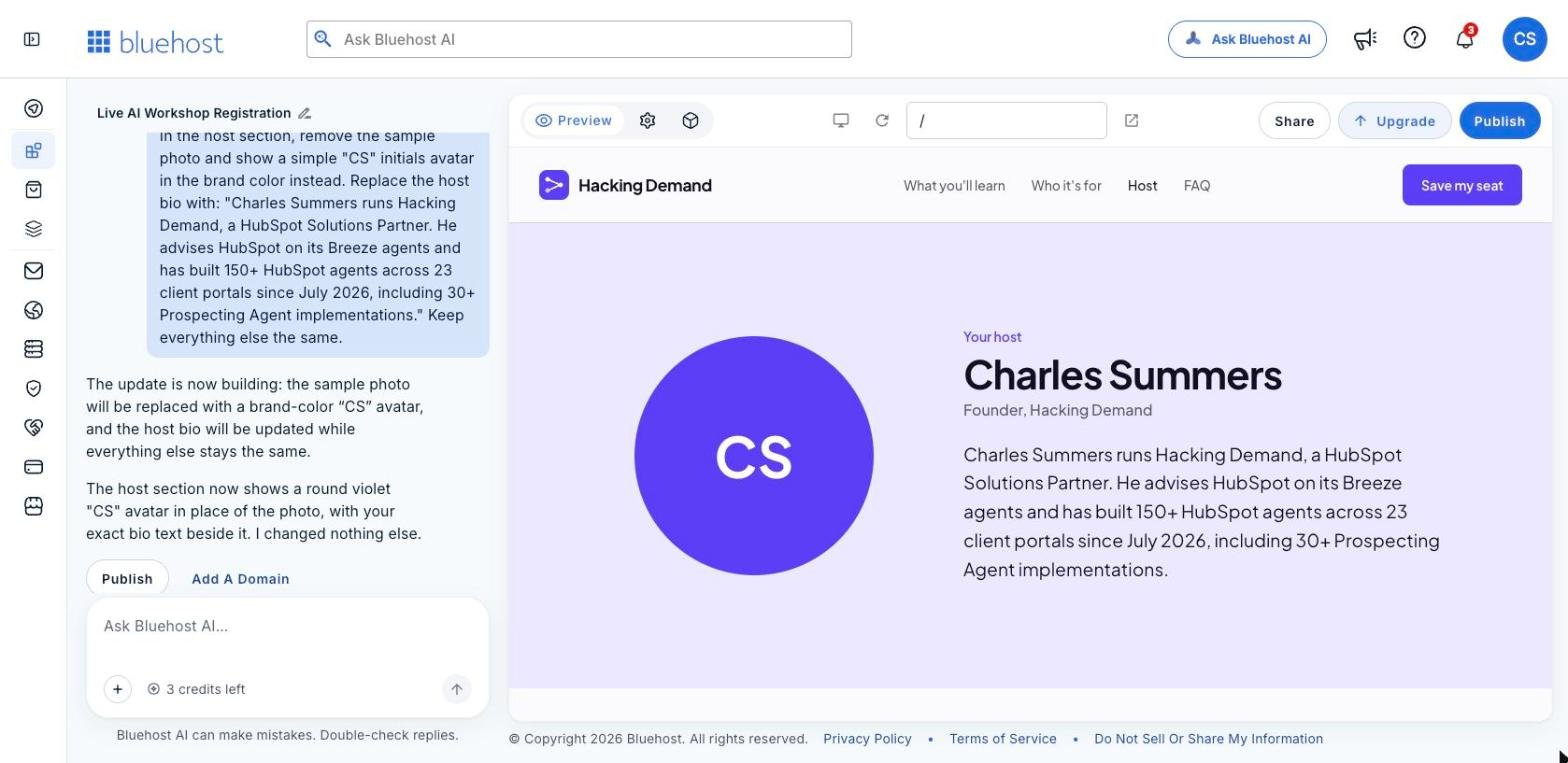
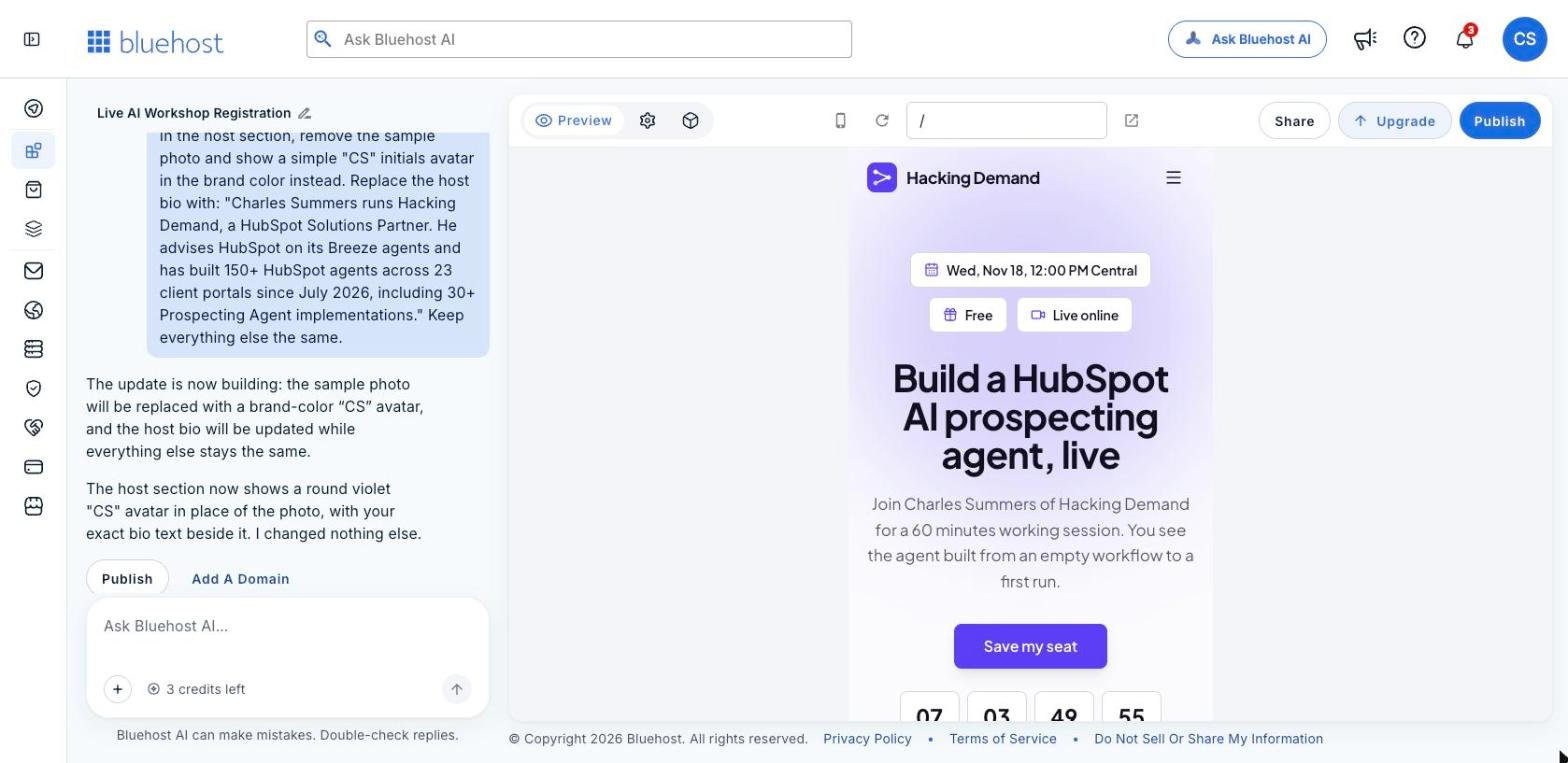
We sent one message asking it to swap the photo for a "CS" initials avatar in the brand color and to use our real bio, word for word. It confirmed the change and said it had changed nothing else.
After one chat message: an initials avatar and the real bio.
If you have a real headshot, use it. If you do not, an initials avatar is better than someone else's face.
Step 5: Look at the form and the confirmation
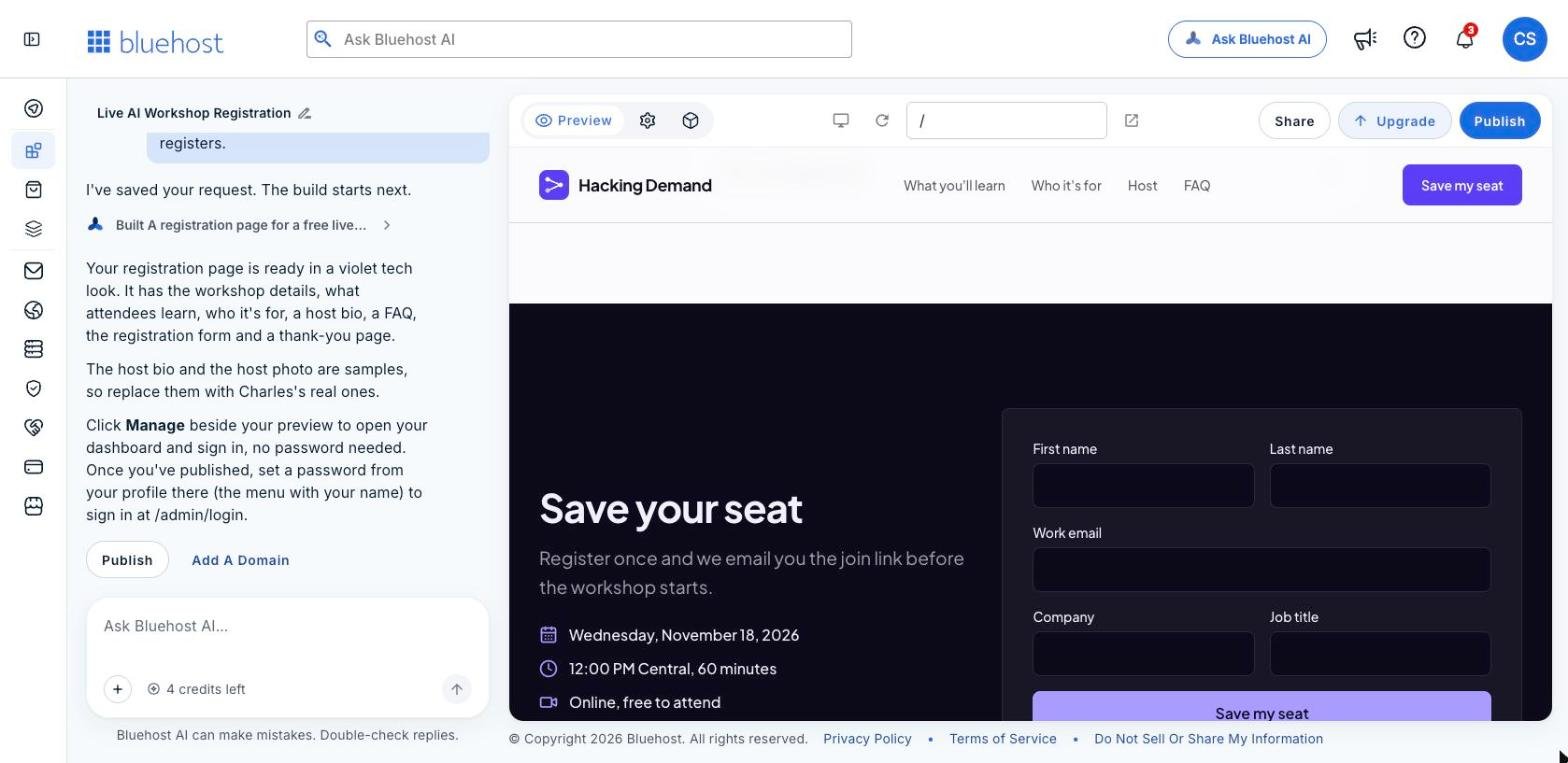
The registration form, with exactly the five fields we asked for.
The Save your seat section repeats the date, time, length and format on the left, with the form on the right: first name, last name, work email, company and job title. Those are exactly the fields we asked for. The builder also said it created a thank-you page for after someone registers, which was the last thing in our prompt.
For a B2B event, company and job title are worth the extra two fields. They tell you who registered before the session, so you can decide who gets a personal follow-up afterward.
Step 6: Find where the registrations go, and clear the samples
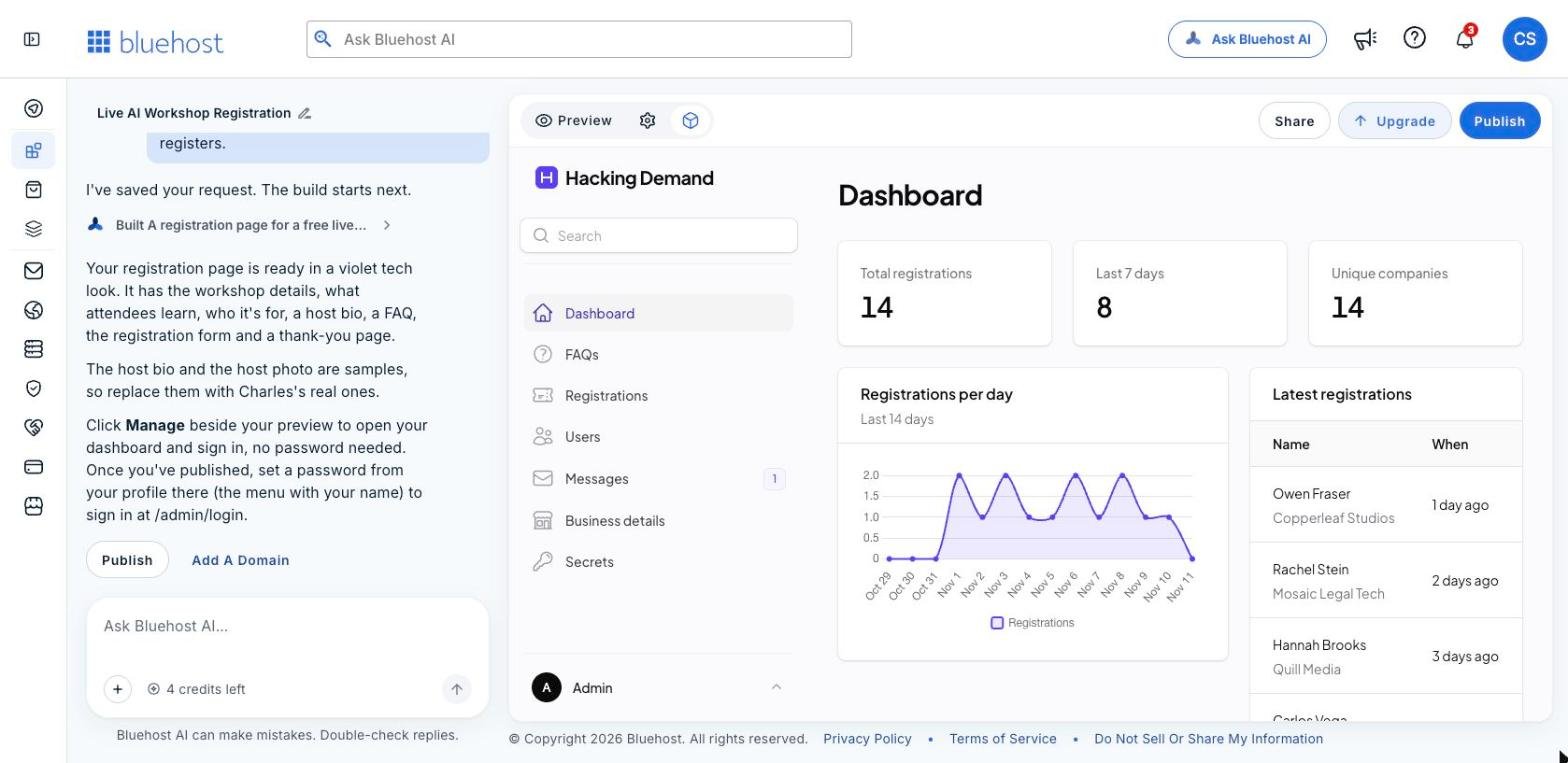
The dashboard it built behind the page, filled with sample registrations so you can see how it works.
This was the part we did not expect. Behind the page, the builder created a full app dashboard with a sidebar for Dashboard, FAQs, Registrations, Users, Messages and Business details. The dashboard shows total registrations, the last seven days, unique companies, a registrations-per-day chart and the latest signups.
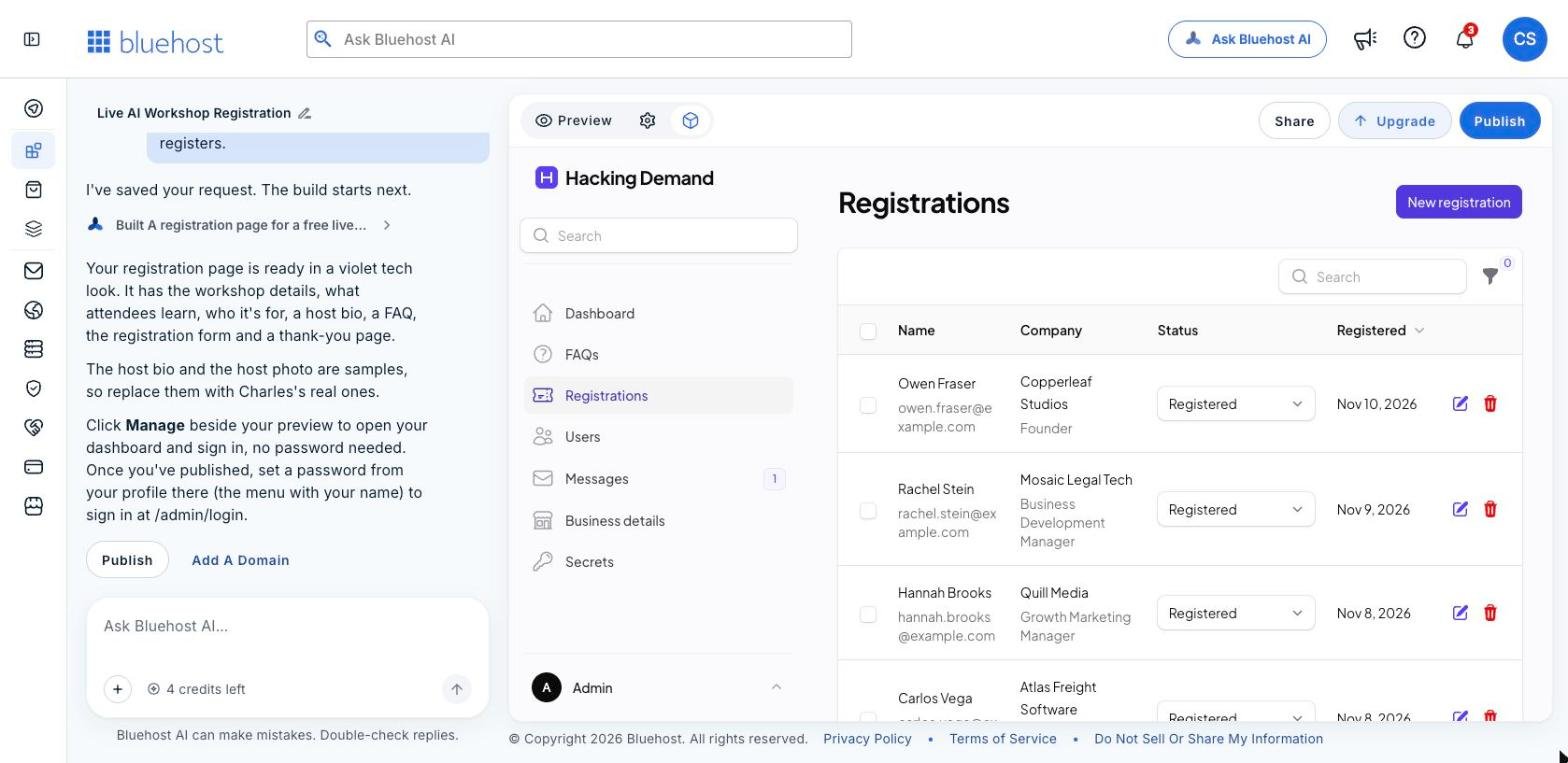
The Registrations table: name, company and title, a status you can change, the date, and edit and delete buttons.
None of those registrations were real. The dashboard came seeded with sample records, with example.com email addresses, so the charts have something to show. That is useful for seeing how it works and dangerous if you forget it is there. Delete the sample records before you publish, so your first real numbers are real.
Each registration has a status you can change, plus edit and delete buttons, and there is a New registration button for adding someone by hand. The chat also explained that the dashboard opens from the Manage button next to the preview, and that once you publish, you set a password from your profile to sign in at /admin/login.
Step 7: Check it on a phone
The mobile preview. The chips, headline, button and countdown all fit on the first screen.
Event invites get opened on phones more than almost anything else. In the mobile preview, the menu collapsed, the chips wrapped onto two lines, the headline stacked, and Save my seat stayed on the first screen with the countdown just below it. We did not need to fix anything.
How many credits did it use?
Each build and each chat edit uses credits. After our first walkthrough the day before, our counter was down to 3. By the next morning it read 5. The new build took it to 4, and the host edit took it to 3. The lesson is the same as last time: put everything you know into the first prompt, and batch your edits into one clear message.
What do you get for free, and what costs money?
Bluehost AI Builder is $0 to start, no credit card. Everything in this walkthrough, from the build and the dashboard to the edit and the previews, happened on the free plan. On the free plan, your site publishes on a Bluehost subdomain. To put the page on your own domain, like events.yourcompany.com, you need a paid plan, with paid plans from $20/mo.
One more decision to make before you promote the page: where registrations end up. They land in this dashboard. If your follow-up runs from a CRM such as HubSpot, decide how each registration gets there before you send the first invite, then test it with one real signup.
When should you use it, and when should you not?
Use it for a free webinar, workshop, launch event or customer session where you need a branded registration page fast and a simple place to see who signed up.
Use it to test an event idea before you build it into your main website or your marketing automation.
Do not use it to sell tickets or products. Bluehost AI Builder is not a store builder. Bluehost points sellers to Bluehost AI Store instead.
The registration page is the start of the funnel, not the end. The workshop this page was built for is a live build of a HubSpot Prospecting Agent, the tool we set up for teams that want follow-up and outbound to run without a rep researching every account by hand. The workshop page and replay are on our site, and our AI prospecting agent builds cover the setup if you want it done for you.
Frequently asked questions
Can Bluehost AI Builder make an event registration page?
Yes. From one paragraph it built the page, a registration form with the fields we listed, a thank-you page and a dashboard to manage registrations.
Is Bluehost AI Builder free?
It is $0 to start, no credit card, with paid plans from $20/mo. You need a paid plan to use your own domain.
Where do the registrations go?
Into the app's own dashboard, where each one has a status you can change. If you follow up from a CRM, plan how registrations will get there and test it before launch.
What should you check before publishing?
Every date, time and FAQ answer against the real event, the host photo and bio, and the sample registrations in the dashboard, which should be deleted.
Next step: describe your next event in one paragraph on Bluehost AI Builder and check the page against your real details. It is $0 to start, no credit card.
Paid partnership with Bluehost. We earn a commission if you sign up through our links.